- Home
- Building Material
- Cement
- Writing on the Wall!
Writing on the Wall!
In the 38th of a series of practical construction tips, Er Jagvir Goyal discusses aspects of wall preparation.
1. Whenever you want to paint the interior walls for the first time, apply simple whitewash on the walls and leave them like that for six months. This action will allow the plaster to dry fully and no patches or spots shall appear later on. It would be ideal if this six month period included a monsoon. After six months, wash the walls fully and remove all dirt, dust and flakes from the walls. Use sandpaper to rub the walls and scrape off lime wash thoroughly. Otherwise your paint will not stick to it. Now apply primers and paints of your choice. Pidilite has recently launched colour concentrates that produce high tint shades when mixed with white wash. Use these if you don’t want to see white walls in the initial months.Pidilite colours come in liquid form and are twice as effective as powder colours, i.e. instead of 100 gm of powder only 50 gm of liquid concentrate is required. Ensure no blue pigment is added to lime solution if a colour concentrate is added to it.
2. For whitewashing, always choose fresh, un-slaked, non-hydraulic lime. See that it belongs to class C category or is of Dehradun or Narnaul quality. To prepare the solution, always add water to lime and not lime to water. Add 5 litre of water per kg of lime and see that the final solution looks like thin cream, not water. Leave the mixture for at least 24 hours, preferably 48 hours. Use 150 gm lime per sq m of surface if one coat is to be done. For two coats, let it be 250 gm per sq m. In a newly constructed house, at least three coats are recommended. However, as you are using whitewash temporarily, only two coats are sufficient. Add an adhesive like DDL or SDL to the mixture at a rate of 4 kg per cu m of solution. Fevicol or gum can be a second option if DDL is not available.
3. Add some Robin blue; say 30 gm per 10 kg of lime to the lime solution. The blue pigment helps add whiteness and brightness to the rooms. However, the quantity of blue pigment must be restricted. Otherwise the walls may give an indigo reflection that looks unappealing. For application of whitewash, use moonj brushes. You must tie gunny bags to the feet of the ladders being used; otherwise repeated pulling or shifting of the ladder may leave marks on the floor. Ensure that, in each coat, the brush passes every point four times—left to right and reverse; up to down and reverse.
4. There are many choices for exterior surfaces and elevation of your house. You can have exposed brickwork or plastered surfaces, a combination of both, or cladding with various types of stones or textured finishes. While choosing an exterior finish, the main purpose is to make the elevation look beautiful and appealing; get a durable finish that survives for a few years at least; and to choose a finish that resists dust and weathering effects and breathes, i.e. allows the moisture of walls to escape without hurting the beauty of the walls.
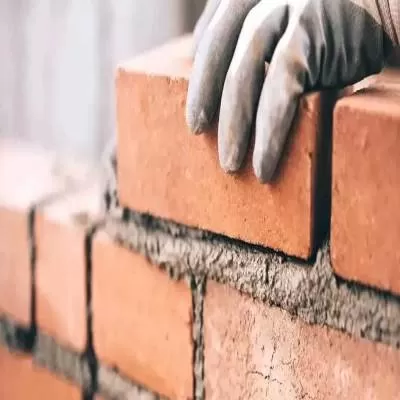
5. If you plan to have exposed brickwork in the elevation of your house, keep sorting out good bricks while doing the brickwork of foundations and internal walls of the house and use them in exposed brickwork for a uniform look. Otherwise use mechanised bricks. When the exposed brickwork of external walls is in progress, do raking of joints to a depth of 10 mm at least when the brickwork is still green. Before applying paint on the exposed brickwork, carry out pointing work.
6. Prefer deep pointing over flush pointing. Always begin pointing work from top downwards. See that all extra mortar is cleaned off and not smeared over the bricks. Do pointing with 1:2 cement sand mortar. Take care that vertical joints are truly at right angles to horizontal lines and any minor errors in brickwork are hidden by the pointing work. Cure the pointing work well for seven days at least.
7. If you choose cement paints (commonly known by trade name Snowcem) on the external surfaces of walls, choose a reputed brand like Super Snowcem. Always pick from a fresh lot and see that the bags are IS 5410 marked. Open a bag, feel the Snowcem in your hand and see that it is free of lumps. In general, cement paint bags or sealed drums showing date of manufacture as within one year of purchase are considered fit but try to get a lot as fresh as possible. That’s because cement paints are just a mixture of cement and pigments and cement attracts moisture from air and loses strength with time. So don’t go by the expiry date on the bags or drums—get a fresh lot.
8. While preparing cement paint for exterior walls, ensure it is dry powder that is added to water and not water to the powder. First take 50 per cent quantity water to make a paste and then add the balance 50 per cent to make a workable mix. Mix thoroughly. At a time, mix only so much that will be used within an hour. Otherwise, the paint mixture will begin to set and brush marks will appear on the surfaces.
9. You must clean the exterior walls of all dirt, dust, loose material and efflorescence with a wire brush and wash it before applying the first coat of Snowcem. Thoroughly wet the surface before applying the paint. Apply the second coat 24 hours after the first coat. After the second coat, keep the surface fully wet for the next two days by spraying water on the paint and not throwing water with a pipe or container. Prefer using a fog spray for best results.
10. For exterior plastered surfaces, prefer Birla White Textura over paints like Snowcem. Textura is also a cement-based paint but with a textured wall finish instead of a plain surface. It has a variety of textures and designs. No primer coat is required for this paint as it is for acrylic paints. Thus it is an economical textured finish. Above all, Textura needs no curing, has extra adhesive strength and resists water and weather. It is mixed with water and applied with a trowel, roller or spray. Roller or spray finished Textura is RF while trowel finished Textura is called TF.
11. Use RF Textura on interiors and TF Textura on exterior surfaces. Textura contains Birla white cement, some minerals, polymers, quartz sand and additives. You can apply it even on damp walls. Textura TF and RF are sold in 25 kg bags. A bag costs around Rs 700. Generally, one bag covers 100 sq ft area. Though the shade card may show many colours, in actual it is applied only in white and then paints like Apex are applied over it. The cost including labour should be about Rs 16 to Rs 18 per sq ft.
In the 38th of a series of practical construction tips, Er Jagvir Goyal discusses aspects of wall preparation. 1. Whenever you want to paint the interior walls for the first time, apply simple whitewash on the walls and leave them like that for six months. This action will allow the plaster to dry fully and no patches or spots shall appear later on. It would be ideal if this six month period included a monsoon. After six months, wash the walls fully and remove all dirt, dust and flakes from the walls. Use sandpaper to rub the walls and scrape off lime wash thoroughly. Otherwise your paint will not stick to it. Now apply primers and paints of your choice. Pidilite has recently launched colour concentrates that produce high tint shades when mixed with white wash. Use these if you don’t want to see white walls in the initial months.Pidilite colours come in liquid form and are twice as effective as powder colours, i.e. instead of 100 gm of powder only 50 gm of liquid concentrate is required. Ensure no blue pigment is added to lime solution if a colour concentrate is added to it. 2. For whitewashing, always choose fresh, un-slaked, non-hydraulic lime. See that it belongs to class C category or is of Dehradun or Narnaul quality. To prepare the solution, always add water to lime and not lime to water. Add 5 litre of water per kg of lime and see that the final solution looks like thin cream, not water. Leave the mixture for at least 24 hours, preferably 48 hours. Use 150 gm lime per sq m of surface if one coat is to be done. For two coats, let it be 250 gm per sq m. In a newly constructed house, at least three coats are recommended. However, as you are using whitewash temporarily, only two coats are sufficient. Add an adhesive like DDL or SDL to the mixture at a rate of 4 kg per cu m of solution. Fevicol or gum can be a second option if DDL is not available. 3. Add some Robin blue; say 30 gm per 10 kg of lime to the lime solution. The blue pigment helps add whiteness and brightness to the rooms. However, the quantity of blue pigment must be restricted. Otherwise the walls may give an indigo reflection that looks unappealing. For application of whitewash, use moonj brushes. You must tie gunny bags to the feet of the ladders being used; otherwise repeated pulling or shifting of the ladder may leave marks on the floor. Ensure that, in each coat, the brush passes every point four times—left to right and reverse; up to down and reverse. 4. There are many choices for exterior surfaces and elevation of your house. You can have exposed brickwork or plastered surfaces, a combination of both, or cladding with various types of stones or textured finishes. While choosing an exterior finish, the main purpose is to make the elevation look beautiful and appealing; get a durable finish that survives for a few years at least; and to choose a finish that resists dust and weathering effects and breathes, i.e. allows the moisture of walls to escape without hurting the beauty of the walls. 5. If you plan to have exposed brickwork in the elevation of your house, keep sorting out good bricks while doing the brickwork of foundations and internal walls of the house and use them in exposed brickwork for a uniform look. Otherwise use mechanised bricks. When the exposed brickwork of external walls is in progress, do raking of joints to a depth of 10 mm at least when the brickwork is still green. Before applying paint on the exposed brickwork, carry out pointing work. 6. Prefer deep pointing over flush pointing. Always begin pointing work from top downwards. See that all extra mortar is cleaned off and not smeared over the bricks. Do pointing with 1:2 cement sand mortar. Take care that vertical joints are truly at right angles to horizontal lines and any minor errors in brickwork are hidden by the pointing work. Cure the pointing work well for seven days at least. 7. If you choose cement paints (commonly known by trade name Snowcem) on the external surfaces of walls, choose a reputed brand like Super Snowcem. Always pick from a fresh lot and see that the bags are IS 5410 marked. Open a bag, feel the Snowcem in your hand and see that it is free of lumps. In general, cement paint bags or sealed drums showing date of manufacture as within one year of purchase are considered fit but try to get a lot as fresh as possible. That’s because cement paints are just a mixture of cement and pigments and cement attracts moisture from air and loses strength with time. So don’t go by the expiry date on the bags or drums—get a fresh lot. 8. While preparing cement paint for exterior walls, ensure it is dry powder that is added to water and not water to the powder. First take 50 per cent quantity water to make a paste and then add the balance 50 per cent to make a workable mix. Mix thoroughly. At a time, mix only so much that will be used within an hour. Otherwise, the paint mixture will begin to set and brush marks will appear on the surfaces. 9. You must clean the exterior walls of all dirt, dust, loose material and efflorescence with a wire brush and wash it before applying the first coat of Snowcem. Thoroughly wet the surface before applying the paint. Apply the second coat 24 hours after the first coat. After the second coat, keep the surface fully wet for the next two days by spraying water on the paint and not throwing water with a pipe or container. Prefer using a fog spray for best results. 10. For exterior plastered surfaces, prefer Birla White Textura over paints like Snowcem. Textura is also a cement-based paint but with a textured wall finish instead of a plain surface. It has a variety of textures and designs. No primer coat is required for this paint as it is for acrylic paints. Thus it is an economical textured finish. Above all, Textura needs no curing, has extra adhesive strength and resists water and weather. It is mixed with water and applied with a trowel, roller or spray. Roller or spray finished Textura is RF while trowel finished Textura is called TF. 11. Use RF Textura on interiors and TF Textura on exterior surfaces. Textura contains Birla white cement, some minerals, polymers, quartz sand and additives. You can apply it even on damp walls. Textura TF and RF are sold in 25 kg bags. A bag costs around Rs 700. Generally, one bag covers 100 sq ft area. Though the shade card may show many colours, in actual it is applied only in white and then paints like Apex are applied over it. The cost including labour should be about Rs 16 to Rs 18 per sq ft.


