After bathroom fixtures and installations
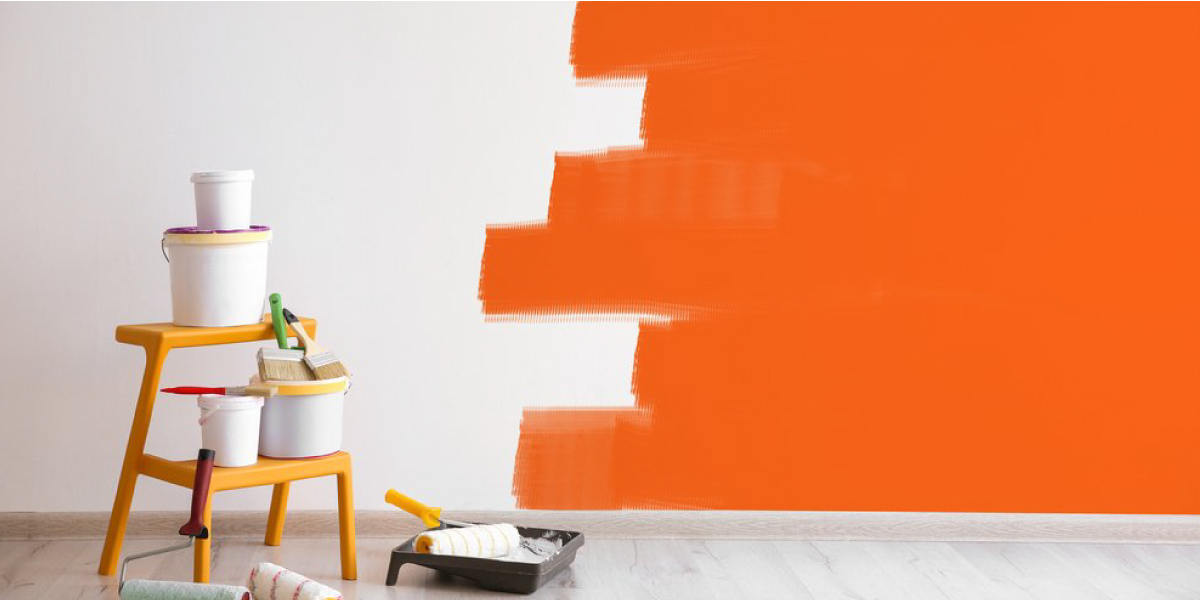
, It is time to begin painting your home and put your imaginations to the test. You have decided on your colours and are ready to bring your vision to life. Painting your home may be a pleasant but time-consuming project, especially if you have never painted before. Fortunately, some excellent equipment in the market will make your home painting project sail much more smoothly.
You could employ a contractor, but they can be expensive. Why pay someone else a week's wages to paint your house when you can band together with your family and do it yourself?
Advantages and Disadvantages of acting as your painting contractor
A general paint contractor can also help you save money by bargaining successfully with subcontractors and executing the business, preventing potential additional costs. He also knows who to employ as subs and has a working relationship with them. The notion that you can hire many subcontractors, give them a set of designs, and have a flawless building at a low cost is invalid.
It might work if you seem well organised, a fast learner, have important economic and designing skills and have the time and inclination to successfully plan and manage a construction project. You can save a significant amount of money, perhaps even 15% or more, if you do everything correctly and avoid any complicated (and expensive) errors.
Advantages:
- It is possible to save 15% to 20% on labour costs (if all goes right).
- You have complete control over the project and are more likely to receive what you desire.
- Notwithstanding your incompetence, if you hire the right subcontractors, the total job quality will be excellent.
- Painting your own home gives you pride and joy.
Disadvantages:
- Due to unforeseeable costs and overruns, actual savings are frequently lower than predicted.
- The job will almost certainly take longer and require more effort than you anticipate.
- Due to your lack of experience, the task will almost certainly have additional issues.
- Experience may also hamper the quality of your painting.
- You will be responsible for the majority of the risk associated with cost overruns and technical issues that arise during the job and after you move in. (In the vast majority of cases, you are solely to blame.)
- Building financing can be tough to come by.
If you decide to take matters into your own hands and paint your dream home's interiors by yourself, here's how you can prepare for the painting process:
Preparation for the process
Let's start by dispelling the idea that there isn't anything fresh to learn about painting. We will offer you a fast summary of the entire procedure in this first chapter, along with up-to-date suggestions on preparation, paint choosing, and cleanup.
There are various considerations to consider before beginning any painting or remodelling project, based on your home's scale and architectural engineering. Before painting your house, double-check that you have all the necessary materials and equipment to complete the job correctly. Various painting products on the market can help you improve the quality and speed you accomplish your painting project.
When painting their houses, many individuals' most widespread problem is a sloppy application process. It is partly because most standard painting tools on the market are intended for general use and do not consider any minor design or size differences that your property may have.
We will go through all of the gear you will need to accomplish your paint job properly in detail. Make sure you go through each part thoroughly to receive all of your knowledge to get the desired painting effects.
Gather your tools
Drop cloths help protect your flooring from paint spills and damage when painting. Attempting to wash dried paint off of your gleaming hardwood floors is a terrible experience, we can assure you. You might say to yourself, "I will be careful, I won't splash paint all over the place," but you'd be mistaken. Paint drips are common in professionals too.
Choosing the paint
It is no surprise that if you want to paint your own home, you will need to start with good paint.
You can pick between two types of wall paint for your walls: emulsion or oil-based. It has its own set of advantages.
Emulsion paint is a water-based solution, while oil-based paint contains oil, as the name implies. Emulsion paint is typically more resilient than many other types of paint.
They also differ significantly in texture: oil-based paints often have silky, impenetrable, and high gloss surfaces, whereas emulsion paints offer smooth, creamy, matte, partly glossy, and glossy ends.In general, however, if at all feasible, emulsion paint should be used.
Paintbrushes
While you could use a paint roller to perform all of your painting, it's frequently better to invest in a few paintbrushes. When it comes to carving in or painting trim, paintbrushes are the best and most accurate option. In a perfect world, you'd have three wide variants of regular paint brushes in your collection.
If you're slicing in, you will need a slanted paintbrush to paint a horizontal line across the doors, windows, and roofs. You will also need a roller covering and grip, as well as a tiny craft brush to smooth out your paint streaks around windows and doors.
Paint roller and tray
Events might entice you to get a paint roller if you're covering a large area. These often make painting your house a tad simpler and take a lot less time. If you're going to paint using a roller, you also need a good paint roller tray.
Drop cloths
There are several excellent furnishings covers on the market that you can use to secure your ornaments and furniture from paint drips or loose paint patches that would otherwise destroy your interior home décor. When finishing any home renovation painting job or project, this phase is necessary to safeguard your home.
Sandpaper to scrub
Since you have never painted a house previously, you might find the inclusion of sandpaper on this list strange. When painting a house, sandpaper is an excellent tool to remove excess existing blemishes and drips. It will also scuff the existing surface to ensure that the paint adheres to it better.
Painters tape
Investing in some painter's tape can help you avoid making a nuisance of your rafters and trim. It's also useful for more detailed work, such as dealing with glass or painting stripes on the wall. Don't use standard tape over paint. When you peel it, the colour from your walls comes right off too.
A ladder
Ladders are necessary tools for any home project that requires you to expand your height or reach. Invest in a step ladder; balancing on a chair or a table is dangerous, and your equipment will appreciate you for not trying it.
Regrettably, they are indeed the cause of numerous home accidents and mishaps. Use the appropriate ladder for the work, usually a stepladder indoors and an extended ladder outdoors. Maintain a smooth area for your stepladder and avoid standing on the top two steps, like the paint shelf.
Paint primer
Because primer is so crucial, it's best not to skip it. A primer improves the adhesion of your paint to the surface, reducing the likelihood that you will need a thousand coats of paint to get the colour to show up properly on your walls. A primer gets frequently used on bare walls, and the result is a white or off-white tint.
Now that you're all set with the correct equipment, let's jump into the fun painting process:
Where do you begin?
- Remove existing wallpaper if remodelling.
Spritz a wallpaper remover solution on the paper. The paper must be damp. Before peeling, wait the necessary amount of time. Using a wallpaper marking tool, score the wallpaper. Deform the form in a circular pattern. You can also use a wallpaper steamer to moisten and loosen the paper. To relax the sheet, press the steam on it for a few minutes. Lead paint may be present in housing units before 1978, so it's vital to check using a testing kit. If your home tests affirmative, you should consider hiring a professional to remove the pests. -
Clean and scrub your walls.
If your surfaces have oil or other material, use TSP (trisodium phosphate) to wash them thoroughly. Follow the procedure offered by the supplier. Allow drying after rinsing with water. To avoid loose debris spoiling the purifying process, clean any dirt on the floorboards and mouldings before cleaning.
Start by rubbing the sandpaper in circular motions over the entire wall and ensure to cover your face to avoid inhaling chemicals. -
Prime the surfaces.
You don't have to use primer for all painting or home repair projects, but experts advise so in some cases.
You only need a primer for painting projects that include the following:
- Unpainted drywall.
- Stained or restored walls.
- Wood that isn't covered.
- Paint finishes with a glossy sheen.
- Changes in paint colour are severe.
You cannot apply latex paint over oil-based paint. You must first prepare the area. Before you begin, you must first determine the type of paint you have. Look for oil-based paint on the surface. Using an alcohol-soaked cotton swab, rub the area or wall you want to paint.
It's latex if the painting peels off. If not, it is oil paint. After that, you will need to scrub the unpainted areas again to level out any surface defects that could impact the general finish of your paint job. Now that you have prepared the painting space, it's time to choose the paint kind and colour that best suits your needs.
The best technique to paint correctly
To achieve the most incredible painting effects, begin painting from the top and work your way down to the bottom. It will help you retain a sense of uniformity throughout the job. Essentially, if you followed these recommendations, you would paint the ceiling first, then the walls, and finally the trim.
Plunge a brush a quarter of the way into the paint and wipe it against the edges to colour the borders, cut. Paint with clean strokes, scuffing out the edges to avoid runs, and holding the brush like a pencil.
It doesn't matter if you get some paint on the trim because you will be painting it afterwards, but attempt not to get too sloppy. Trim one block at a stage for the walls, then shift to the roller. Working with two individuals can be way more straightforward. While one person cuts, the other utilises the roller.
How much paint will you need?
In most cases, one gallon of paint should cover around 400 square feet of surface space. To figure out how much paint you will need, multiply the width of your walls by the height to obtain the floor space for each division, then put them together to get the overall square footage to figure out how many gallons of paint you will need.
Multiply the height (in feet) for the floorboards or trim. To get the total square footage, multiply five by the width to get the whole square footage. From there, you can figure out how much paint you will need to finish the task.
How much time will it take to paint a room?
Painting an entire room might take anywhere from a few days to many weeks to finish. To ensure that you promptly produce the target you want, think accordingly and ensure that you have ample airflow while labouring on your painting home project to avoid overexposure to possibly toxic chemicals.
Bottom line
It's thrilling to design and paint your own home.
It takes time, effort, and preparation, but the result is a fully customised home explicitly painted for you and your family. The process should be rather pleasant and stress-free if you pick a reliable contractor.
However, if you have got some skills up your sleeves, painting your home from scratch all by yourself is no big deal. Get the right equipment and reliable paints to ensure a smooth sail when enhancing your dream home with colour. Let us now move on and on to exterior landscaping of your new, almost ready home!